Mushroom Coffee Grounds Kit – Hints and Tips
We’ve put together this guide to help you get the most from your Coffee Grounds Kit and also to help out with any problems you might encounter. We kept the instuctions on the kit fairly brief; a long set of instructions can be off-putting and we also wanted to keep them on the tub so they were easy to refer to and wouldn’t get lost!
Filling the Tub
If you’re using coffee from a machine then there probably won’t be any problems with the grounds being too wet. With a cafetierre, however, the grounds are often on the wet side – especially with finer espresso style coffee. If the grounds are too wet this can lead to contamination with the dreaded green mold. So our advice is to strain the coffee using a sieve, or in some muslin cloth, before it goes in the tub. Or you can spread it out on a clean plate for an hour or so to let it dry off.
Keep the layers of coffee thin and spread it out. When adding the spawn, add it so the grains are evenly spaced and evenly distributed over the coffee without leaving big gaps between them. You’ll notice that the mycelium radiates out in circles which want to find each other and join up to form a network. Keeping the grains evenly spaced helps it do this quicker and once a network has formed the coffee won’t get contaminated with mold. Also, it’s a good idea to spread the coffee right on top of patches of mycelium like we’ve done below.
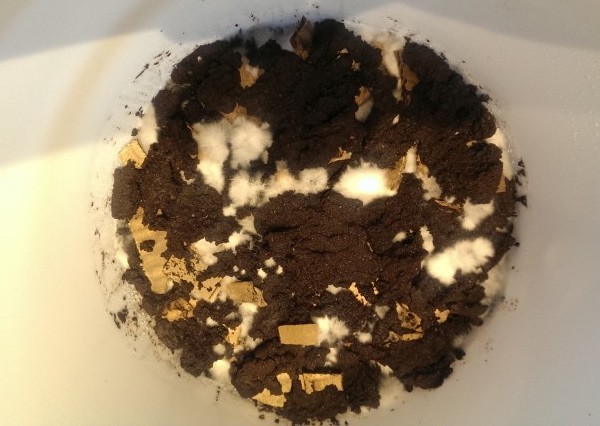
The mycelium is spreading through evenly, with patches appearing all over.
The main way to tell if your kit is too wet, is the amount of condensation on the lid. If there is a lot, then it’s too wet. Wipe it off and increase the number of cardboard chips that are going in. If you run out, you can always make some more by cutting up a clean box, or you can use kitchen towels torn into pieces.
If green mold does begin to appear there are two ways to halt it’s growth: 1) Sprinke some salt on it, and or, 2) spray it with a dilute bleach solution. Both of these methods won’t harm the mycelium, but keep them targeted on the mold as best you can. Oyster mushroom mycelium can eventually overcome green mold if it is contained in small patches, but if it starts to run rampant unfortunately there is not alot you can do. We will happily send you some new spawn and cardboard chips for you to have another go, so please do get in touch.
Growing Oyster Mushrooms
To get a good crop of Oyster mushrooms daylight is an important part of the growing process. If there is too little light, the yield will be reduced, with some mushrooms in the cluster ‘aborting’ as a result. A south facing window will provide the best results, but make sure the mushrooms aren’t exposed to direct sunlight as this will quickly dry them out. Artifical light can be used effectively to supplement daylight, like a strip light or a desk lamp.
It can take a while for the kit to really get going. You might find that the first couple of crops are on the small side, but don’t worry the mycelium is still growing and continuing to build up resources from the coffee grounds. Whilst the top of the grounds appear completely white and fully colonised with mycelium there may be patches underneath that it hasn’t fully colonised yet. Take a look at the outside of the tub, and if you can see dark patches through the plastic the best crops are yet to come. When these patches disapear and all you can see is white mycelium, this is when you’ll start to see best results from the kit.
After the First Crop or Flush
Preparing the top of the grounds below the hole in the right way will help enormously in getting subsequent crops, or flushes. After you’ve pulled away the cluster, there will probably be a tough piece of stem left, firmly attached to the grounds. It needs to be removed with the help of a clean spoon. Remove the lid and scoop under the stem to reveal the grounds below.


Once you’ve done this keep the grounds above the hole moist and the mycelium will grow back (re-colonise) in preparation for the next flush.
After a couple of flushes you’ll probably notice that the grounds are starting to shrink away from the lid. Moisture travels to the mushrooms to enable them to grow through evaporation, so inevitably the grounds will begin to de-hydrate. The distance from the top of the grounds to the hole will increase meaning the mycelium has to use more energy to build up it’s stem to allow the mushrooms to grow freely, which will reduce the size of the flush. After the 3rd flush, you can add more fresh coffee grounds to build it back up, and like before ensure there is a cavity just below the hole. Just before you add some new grounds, the surface needs to be ‘ruffled’. With a clean fork, rake over the whole surface penetrating down about 5 millimetres to expose the mycelium underneath, then begin adding the grounds. This will get the new grounds colonised quicker as they are coming into contact with more of the mycelium. After adding the new grounds, it’ll be 2-3 weeks before they begin to flush again.
We hope you’ve found this article useful, and if you have any questions please get in touch.

